1. Check Water Level
First, remove the tank lid and check the tank water level. The water line is marked on the flush valve overflow tube inside the tank.
2. If the water level is above the water line
If the water level is above the water line and too high, the water in the unit will continuously flow into the overflow tube. Adjust the fill valve screw rod connecting to the float cup to lower the float cup until the water refills will rest on the water line. If this does not solve the issue, the fill valve will need to be replaced.
To adjust the fill valve, follow the instructions below:
-
To lower the float cup (or to lower the water level inside the tank),
- Flush the tank
- While the tank is flushing, lower the float cup by turning the head of the fill valve screw rod, by hand or with a screwdriver, counter-clockwise.
- The fill valve will shut off at the new setting.
- Make sure the water level is resting at the water line.
- Repeat the above steps if it needs to lower more. Or follow the steps below if you need to raise the water level.
-
To raise the float cup (or to raise the water level inside the tank),
- Flush the tank
- While the tank is flushing, lower the float cup by turning the head of the fill valve screw rod, by hand or with a screwdriver, clockwise.
- The fill valve will continue to fill until water is filled to The fill valve will continue to fill water until it reaches the new setting.
- Make sure the water level is resting at the water line.
- Repeat the above steps if it needs to lower or raise more of the water level.
3. If the water level is at the water line
If the water is level at the water line, shut the water supply off, wait for 30 min., remove the tank lid and see if the water level inside of the tank lowers or if it remains the same.
-
If the water level drops and this is a new toilet install, verify if the flapper is fully closed and see if the flapper chain is connected properly. The flapper chain should have some slack, and the flapper can fully lift when the tank lever is actuated. Adjust the flapper chain position if required. If this does not fix the leak, you may need to replace the entire flush valve.
-
If the water level drops and this is an existing installation, test the toilet flapper for leaks with the steps below:
- Pouring a bit of food coloring into the toilet tank water.
- Check back in 15 minutes to see if the water in the toilet bowl has changed colour.
- If it has, then most likely your toilet flapper needs to be replaced.
If this does not fix the leak, you may need to replace the entire flush valve.
Ensure the flapper is set correctly. If the peg is broken or the rubber seal at the bottom of the flapper is warped, the complete flush valve will need to be replaced.
NOTE TO Agent: The entire flush valve will need to be replaced because the flapper is not a separate replaceable part for now.
-
If the water level remains the same, there may have debris in the fill valve preventing the valve to open or close properly. To clean out, follow the steps below:
- Turn off the water supply valve to the tank. There is no need to empty the tank.
- Raise the arm connected to the adjustment rod, which will also raise the float cup
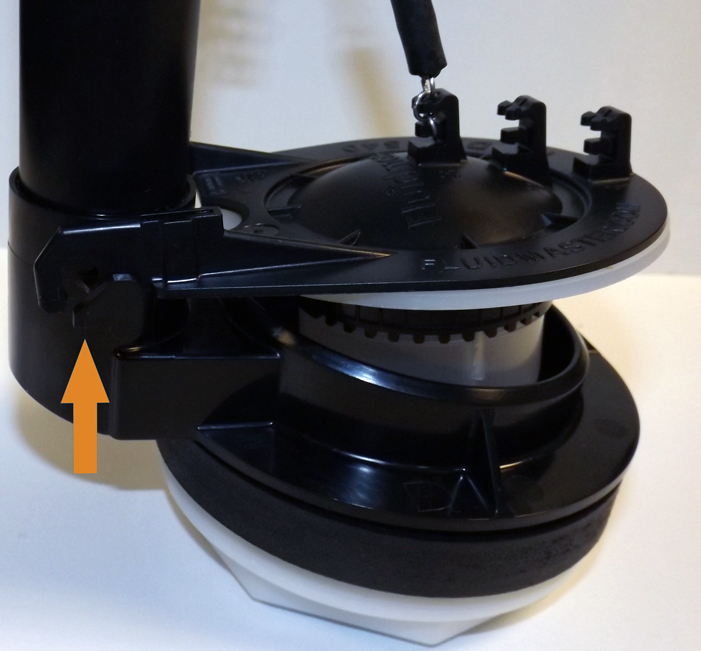
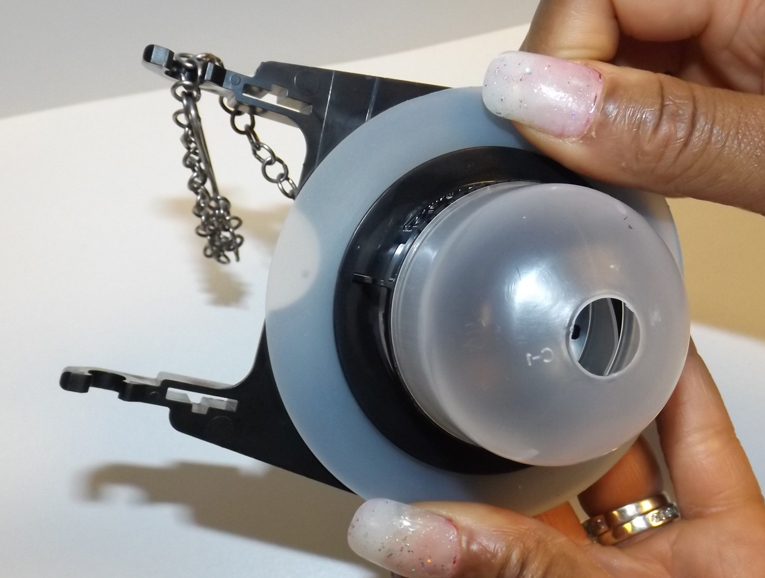
- Push the cap down and twist counter-clockwise to unlock the cap. Then pull off the cap.
- Check and scrape out any debris present. Open the water supply valve and run the water for a few seconds to flush away debris. To avoid getting sprayed, hold a plastic cup over the valve before turning on the water supply valve.
- Turn the water supply off and place the cap back on the valve by twisting it clockwise to lock it back in place.
- If this does not solve the issue, the fill will need to be replaced.
If you have a Dual Flush Glacier Bay Made in Mexico Toilet, model # 215-583, see the article on "What should I do if my Glacier Bay Made in Mexico Dual Flush Toilet 215-583 is having a flushing performance issue?"
For additional help in regards to your toilet, you can reach out to contact our technical support team.
Comments
Please sign in to leave a comment.